Appearance
Component parsers
Codify can map design components to frontend components. This means you can easily generate real, interactive frontend code.
How to use
We recommend that you:
- Understand the Props attributes of frontend component libraries.
- Have at least completed the structural design of a design component or use the Figma component template we provide.
- Learn about the role of style parsers and render options along the learning path.
Getting started
We will start from the first component and gradually progress, making it easy for you to master the entire process and generate code that meets project requirements.
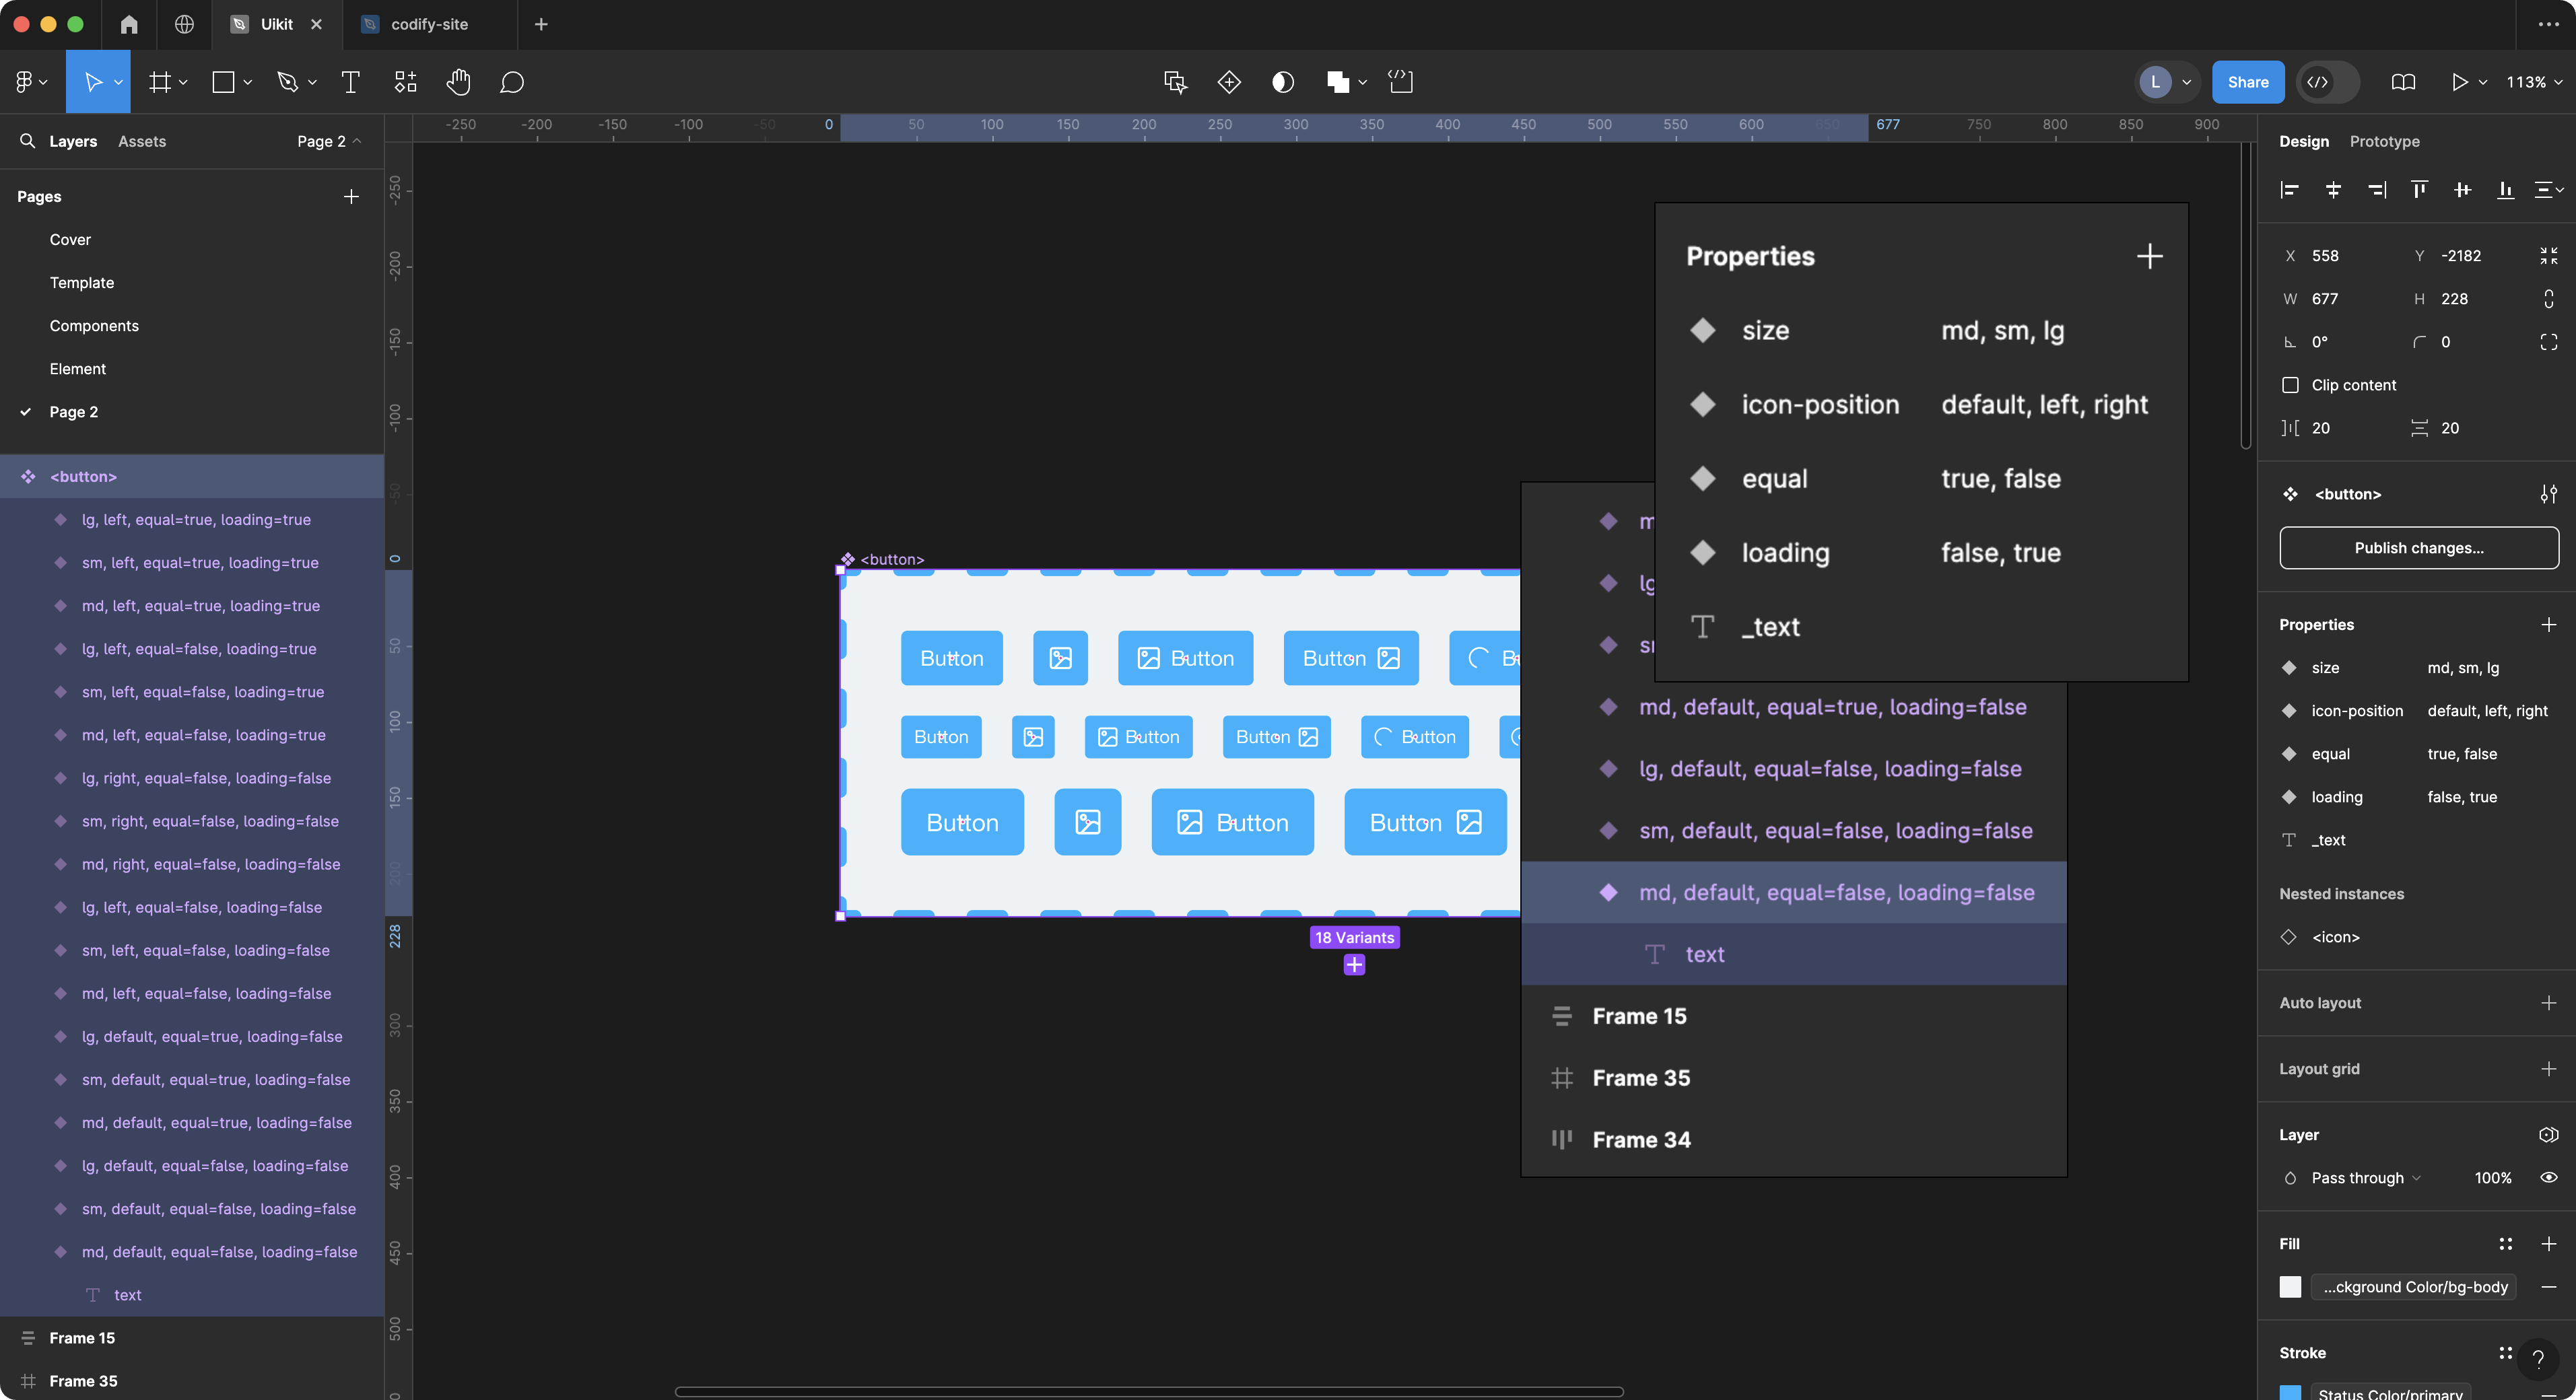
Firstly, we create a component called <button> and its various variants. We also select a text layer as the content of the component. Now, what I need to do is write the configuration to parse this button component in the component_parsers.json file in the Codify backend.
The simplest component parsing configuration is as follows:
The code below is used to declare the name of the component you want to parse.
json
// component_parsers.json
{
  "button": {},
  "input": {},
  "select": {},
}
Codify will mark layer names wrapped in <> angle brackets as frontend components, such as <button>, <input>, <select>. When generating code, you will get:
html
<button></button>
<input />
<select></select>
<!-- If you have set a component prefix in the feature.json, you will get: -->
<el-button></el-button>
However, it doesn't output any content or attributes. In this case, you need to use Render Options to add the rendering content for the component.
Render Options
With Render Options, you can customize the parsing method for the component.
json
"button": {
  "props": {},
  "text": {
    "params": {
      "nodeName": "text"
    }
  },
  "type": {
    "params": {
      "valueFrom": "background"
    }
  },
  "disabled": {},
  "flex": {}
},
Other component configurations follow a similar approach to the button configuration. Codify provides a set of demo components and configurations that you can download and explore in the Community Resources.
Parsing Multiple Layers with a Style Parser
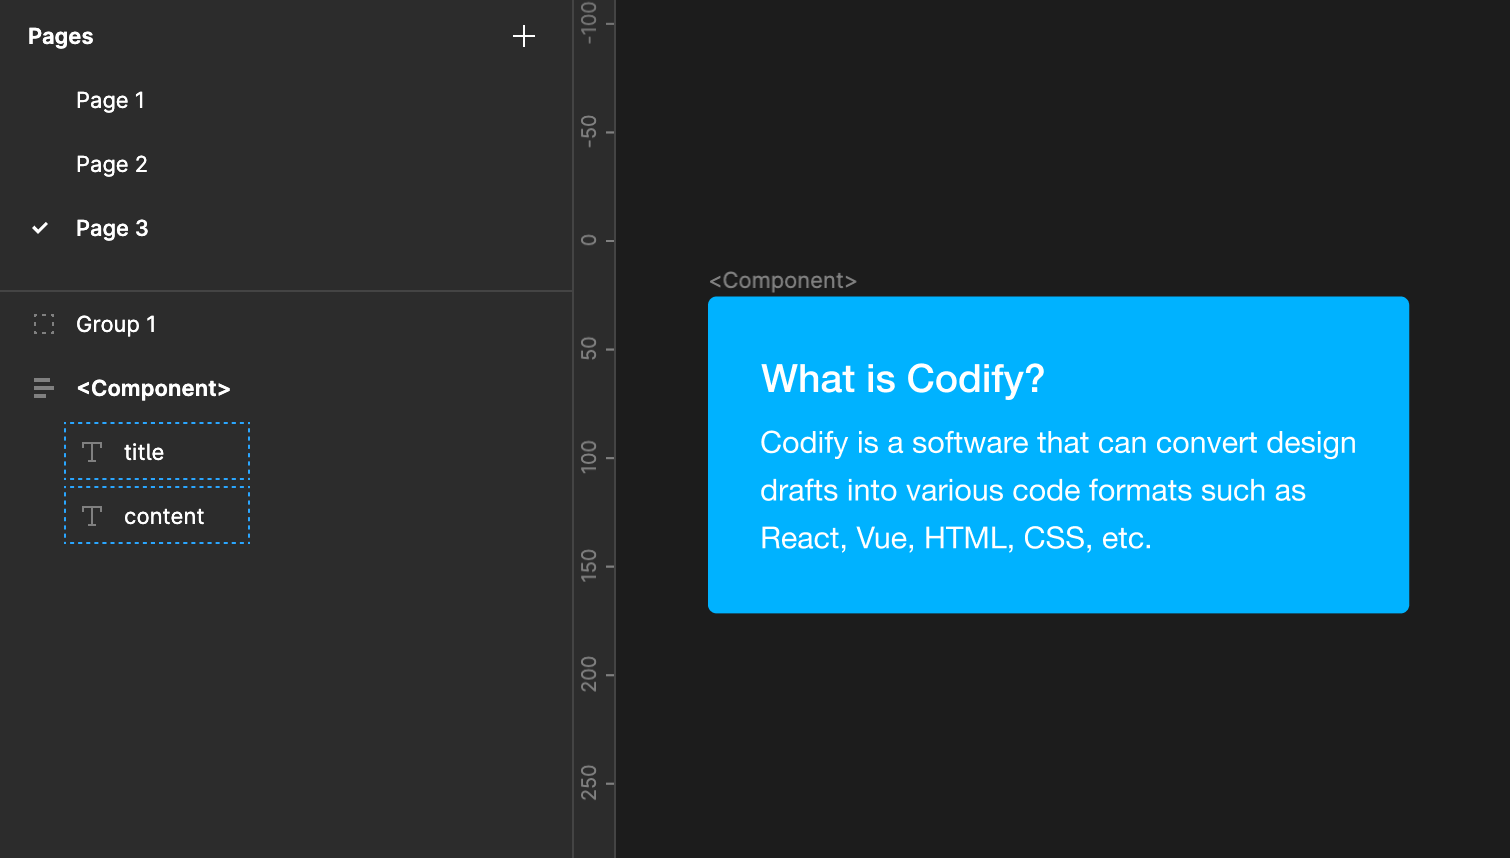
In component parsers, it is common to read the properties of multiple layers and use them as attributes for the component. For example:
html
<Component title="Title text" subtitle="Description text" />This component needs to read the content of one text layer to set the title and another text layer's content as the subtitle. In this case, you can use an array-type style parser to parse these two layers separately. Here is an example:
WARNING
You may attempt the following approach, but it won't work correctly because the second text parser will override the first one
json
// Incorrect example
"Component": {
  "text": {
    "nodeName": "title",
    "textAttr": "title"
  },
  "text": {
    "nodeName": "content",
    "textAttr": "subtitle"
  }
}
The correct approach is to use an array
json
// Correct example
"Component": {
  "text": [
    {
      "nodeName": "title",
      "textAttr": "title"
    },
    {
      "nodeName": "content",
      "textAttr": "subtitle"
    }
  ]
}
You can also find similar usage examples in the configuration below.
Props parsers
props is used to read and parse component properties from design files. Please refer to the Design Component Creation Guidelines for more information.
json
"props": {
  "filter": ["md", "default", "false"]
}
By default, 3 filtering properties are set. When your design component instance uses the above properties, it will not be parsed into code. If you don't want to filter any values, please set:
json
"props": {
  "filter": ""
}
showTrueValue
- Type:
boolan - Default:
false
Whether to display the true value. Typically, the true value is ignored. For example:
jsx
"props": {
  "showTrueValue": false
}
// Output
<Button disabled />

"showTrueValue": true
// Output
<Button disabled={true} />
Traverse parsers
By default, props is configured with three types of filtered properties. If your design component instance uses any of these properties, it will not be parsed into code.
json
"traverse": {
  "filter": ""
  // You can use the filter option to exclude node names that you don't want to traverse.
}
If you have set the ignore_prefixes in the feature.json, the system will prioritize filtering the node names specified in the configuration.
Type parsers
The type attribute is used to retrieve the type of the component. When using the type parser, Codify will output the corresponding type based on the status_color color you have set. For example:
json
"type": {
  "nodeName": "",
  "valueFrom": "background",
  "attrName": "type",
  "filter": "default"
}
If you select the primary style, it will output <Button type="primary">Primary Button</Button>. Please refer to the Render options for other attributes.
If you want to write the property to a different name, you can change the value of the attrName property. For example, "attrName": "color", in this case it will output <Button color="primary">Primary Button</Button>.
TIP
The traverse attrs and type parsers are specifically designed for component parsers. You will frequently encounter them while reading the Component parsers documentation.
Multipurpose attr parser
The attr is a versatile property parser that supports parsing styles for background borderColor color radius borderStyle opacity gap padding boxShadow.
What can it do?
We can use the attr property to fetch the specified styles of a node, and then apply the corresponding properties to the component. This can greatly reduce the effort required to create component variants.
For example, when you want to output an outlined property for a button, you can use mappings to map the borderColor style:
jsx
"button": {
  "props": {},
  "flex": {},
  "attr": [
    {
      "valueFrom": "borderColor",
      "attrName": "variant",
      "mappings": {
        "primary": "outlined",
        "success": "outlined",
        "warning": "outlined",
        "danger": "outlined",
        "info": "outlined"
      }
    }
  ]
}
// output
<Button variant="outlined" color="error">
  Error
</Button>
Case 2:
Based on a button with no filled background color, output the text property.
jsx
"button": {
  "props": {},
  "flex": {},
  "attr": [
    {
      "valueFrom": "borderColor",
      // ......
    },
    {
      "valueFrom": "background",
      "attrName": "variant",
      "mappings": {
        "none": "text"
      }
    }
  ]
}
// output
<Button variant="text">
  TEXT
</Button>
Case 3:
Based on the Corner radius, obtain a pill-shaped button.
jsx
"button": {
  "props": {},
  "flex": {},
  "attr": [
    {
      "valueFrom": "borderColor",
      // ......
    },
    {
      "valueFrom": "background",
      // ......
    },
    {
      "valueFrom": "radius",
      "attrName": "shape",
      "mappings": {
        "9999px": "round"
      }
    }
  ]
}
// output
<Button shape="round">
  Round Button
</Button>
Icon parsers
icon is the icon component used for parsing. You can get the specified icon by setting the nodeName. For example, we set the icon property for the Button component:
jsx
"Button": {
  "props": {},
  "text": {
    "nodeName": "_text"
  },
  "flex": {},
  "icon": {
    "attrName": "icon",
    "nodeName": {
      "name": "icon",
      "deepFind": true
    }
  }
}

// You can get the following result:
<Button type="primary" iconPosition="start" icon={<SearchOutlined />}>
  Search
</Button>
If you want to parse the icon separately, you can place the icon in a container named @icons in the design file, and it will be automatically parsed into an icon component, resulting in the following:
jsx
<SearchOutlined />This does not require any setup from you.